Controlling our Raspi W2812 Light strip now with an Android App…
Since the Bluetooth’s RFCOMM protocol is basically the same as the USB’s serial port I decided to build also an App for my Raspi W2812 Light. First I wanted to create a single listener on both the Bluetooth’s RFCOMM and USB serial port. I found the Java Simple Serial Connector (JSSC) library for the USB communication and Bluecove for the Bluetooth communication. I then realized that the Bluecove will not be neccessary because the JSSC can listen to both devices, in my case/dev/ttyGS0 and /dev/rfcomm0 in the same way. The only thing I needed to make sure is that the baud rate matches. For that purpose I used baud rate 115200.
Server
Because I wanted to have a single point of message entry I am replacing the reader.sh script from last time and adapted a bit the communication protocol between the light and other devices. So now we can read the input from both, /dev/ttyGS0 or/dev/rfcomm0, which is the USB or Bluetooth respectively of our Raspberry, line by line. If a line containing “STX” is seen it starts listening. In the listening mode all new lines are stored until a line containing “ETX” is seen. Then we calculate a CRC32 and send it back in the following format “ACK:[CRC32]“. If the sender receives this message and the CRC32 matches the one it calculated itself it sends back “ACK“. If the receiver receives this acknowledgment it saves all what was received in the last payload in the /etc/light-strip/light.conf file for the python script to pick up.
The server can be found here: https://github.com/kubovy/raspi-w2812-server.
Android App
 The android app is quite simple. In the beginning it shows you the list of paired devices where you need to pick the one representing the Raspi W2812 light. Note that you need to pair your phone with the light before you can use this app.
The app stores a list of light configurations as described in Raspi W2812 Light post additionally with a “set name” as free text. The light configurations are grouped by those sets. We can run a whole set or just one configuration.
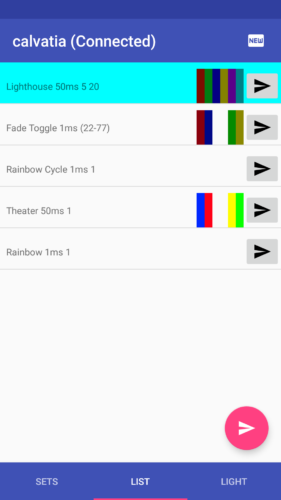
There are three tabs on the bottom. The first is showing the list of “sets”. In this tab if we press on the “send” button next to a set the whole set will be sent to the light. If we press somewhere else on the set item we will be navigated to the “list” tab where the list of the light configurations will be shown.
In the “list” tab pressing on the floating action button on the bottom right will send the whole set to the light. Pressing on the “send” button next to a light configuration will send only this one configuration to the light. Pressing somewhere else on the light configuration will navigate us to the “light” tab where the light configuration details will be shown.
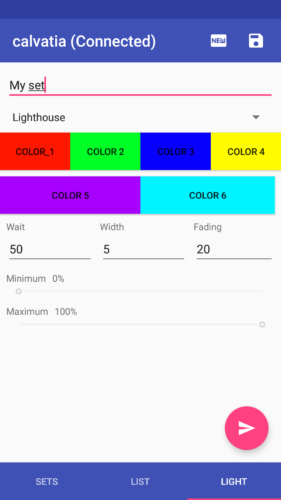
In the “light” tab we can change the colors and other parameters of the light configuration and also the set on the top. By pressing the floating action button on the bottom right the configuration will be sent to the light. If we want to save our configuration for later we need to press the “save” button in the action menu.
You can find the app in the store:
![]()
Also the code to the app is available: https://github.com/kubovy/raspi-w2812-android.
Startup
We need to change our Cron jobs on our Raspi W2812 light as follows:
@reboot java -jar [JAR] /etc/light-strip/light.conf /dev/rfcomm0
@reboot java -jar [JAR] /etc/light-strip/light.conf /dev/ttyGS0
Maybe you should wrap those calls in case there is an exception it restarts again.
Updates
19.12.2018: updated backend for the raspberry: https://github.com/kubovy/raspi-project